Posts Tagged ‘cookbook’

Jonathan Waxman’s Warm Sweet Onion Tart

August 9th, 2010
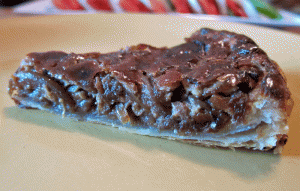
Warm Sweet Onion Tart Slice

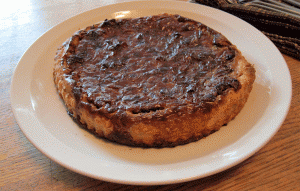
Warm Sweet Onion Tart

Jonathan Waxman is one of my favorite chefs. Credited with bringing California cuisine to New York City, he was a celebrity chef in the pre-Food Network era, little known to those outside the food industry and restaurant aficionados. Thanks to an exceptional run as a contestant on Season 2 of Top Chef Masters, he is finally getting some well-deserved renown from the general public.

On a recent summer evening, the roll-up doors to his West Village restaurant, Barbuto, were wide open and conviviality virtually poured out onto the sidewalk. Chef Waxman was overseeing the dining room and kitchen, a particularly refreshing sight at a time when several star chefs seem to have little to do with their establishments. While the space has an unfinished feel about it, it is quite deliberate and puts a spotlight on the rustic and beautifully crafted cuisine.

My friend Anne introduced me to his cookbook, and it’s a page- turner. It perfectly expresses my ideal culinary philosophy: Use few ingredients of the freshest and finest quality to create soul-satisfying food.

We had friends over for a late lunch on a particularly sweltering day. I wanted to serve something substantial but not hot, and so chose this tart. I prepared it in the cool of the morning and then served it room temperature with a salad. It is sweet, savory, tangy, and rich, and tastes awfully complicated for something that has only seven ingredients.

Warm Sweet Onion Tart
by Jonathan Waxman
from: A Great American Cook: Recipes from the Home Kitchen of One of Our Most Influential Chefs
© Houghton Mifflin Harcourt, 2007

Serves 6 (or four as a main course with a salad -t)

– 2 large sweet onions, such as Vidalia
– 4 tablespoons (1/2 stick) unsalted butter
– 1/2 cup balsamic vinegar
– Kosher salt and freshly ground black pepper
– 1/2 pound puff pastry, preferably an all-butter brand such as Dufour (or 1 sheet pastry from a 17 1/4-ounce package)
– 2 large eggs
– 1/2 cup heavy cream
– A few thyme blossoms or 1 teaspoon fresh thyme leaves

Slice the onions crosswise as thin as possible. Place a large skillet over very low heat. Add the butter and when it melts, stir in the onions. Cook, stirring occasionally, for 30 minutes, or until the onions are very soft and deep golden brown.

Add the vinegar to the onions and cook until it has reduced and slightly thickened, 5 to 10 minutes. Remove from the heat and let cool, then season with salt and pepper.

Heat the oven to 400 degrees.

On a lightly floured surface, roll out the puff pastry 1/4 inch thick. Using a pot lid or a plate as a guide, cut the pastry into a 10-inch round. Fit the pastry into an 8-inch tart pan with a removable bottom. Trim the edges of the pastry if necessary and prick it all over with a fork. Bake for 15 to 20 minutes, or until golden brown on the bottom. (Don’t be afraid that the tart shell will burn later when it is baked again – the filling will prevent that from happening). Take the tart shell out of the oven and let cool on a rack for 10 minutes.

Whisk the eggs lightly in a medium bowl. Add the cream and thyme and blend well, then season with salt and pepper. Spread the onions evenly in the tart shell. Pour the egg mixture over the onions and stir gently with a fork so the custard mixture spreads evenly in the tart shell.

Bake the tart for 25 minutes, or until just set. Remove and let cool on a rack. Serve warm or at room temperature, cut into wedges.

Sweet Onion Tart

Warm Sweet Onion Tart. Not as pretty as Chef Waxman would make it, I'm sure.

Ham & Swiss Rosti

June 8th, 2010

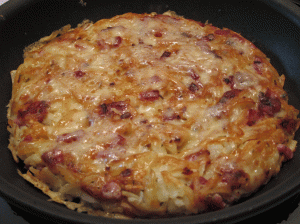
Ham & Swiss Rosti in the Pan

Week 3, day 3 of My Eating Well Challenge.

Rösti, at its simplest, is shredded potatoes which are pressed into a layer in a saute pan, and fried with some type of fat to make a potato cake that is crispy on the outside, and is generally served as a side to an entree. By adding ham and cheese and serving it with a vegetable or salad, the dish becomes hearty enough for dinner.

I found the rosemary a bit distracting, as it has a particularly aggressive flavor that nearly overwhelmed the cheese and ham. I’d be inclined to leave it out, or cut the amount in half. Otherwise, all the flavors and textures of great comfort food are there, and I’d never have guessed that this rosti is low calorie. You can even forgive yourself for having two pieces if the mood struck you. This would likely be very tasty (and pretty) served for breakfast with a sunny side egg on top, which is what I’ll try next time…and there will definitely be a next time.

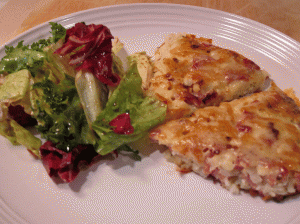
Ham & Swiss Rosti
From The EatingWell for a Healthy Heart Cookbook
View the recipe and nutritional information at EatingWell.com.

1 large egg
1 cup diced ham, (about 5 ounces)
1 cup shredded part-skim Jarlsberg, or Swiss cheese, divided
1 shallot, minced
1 teaspoon chopped fresh rosemary, or 1/4 teaspoon dried
1/2 teaspoon freshly ground pepper
1/4 teaspoon salt
4 cups frozen hash brown potatoes
2 tablespoons extra-virgin olive oil, divided

1. Beat egg in a large bowl. Stir in ham, 1/2 cup cheese, shallot, rosemary, pepper and salt. Add frozen potatoes and stir to combine.

2. Heat 1 tablespoon oil in a large nonstick skillet over medium heat. Pat the potato mixture into an even round in the pan. Cover and cook until browned and crispy on the bottom, 4 to 6 minutes.

3. Remove the pan from the heat. Place a rimless baking sheet on top. Wearing oven mitts, grasp the pan and baking sheet together and carefully invert, unmolding the rösti onto the baking sheet. Wipe out any browned bits from the pan. Return it to the heat and add the remaining 1 tablespoon oil. Slide the rösti back into the pan. Top with the remaining 1/2 cup cheese, cover and cook the second side until crispy and browned, 4 to 6 minutes. Slide onto a platter, cut into wedges and serve.

Ham & Swiss Rosti

Turkey Mini Meatloaves

May 25th, 2010

Turkey Mini Meatloaf

Week 2, day 4 of My Eating Well Challenge.

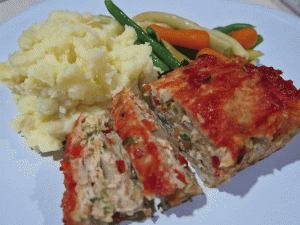
In 1990, there was a film about an advertising executive whose “truthful” campaigns are accidentally published. One of those was for Volvo: “They’re boxy, but they’re good.” This is exactly the thought I had when I tasted the meatloaf, due to its compact, rectangular shape. I have made this recipe using muffin tins, but I found the small loaf shape is more attractive for serving and makes for more evenly cut slices for sandwiches.

You will be absolutely stunned at how quickly the recipe comes together. Turkey meatloaf tends to be dry, but this recipe is particularly moist thanks to the vegetables and couscous, and just a touch spicy from the mustard and Worcestershire.  Ignoring the color, one does not miss the beef at all.  I replaced the optional barbecue sauce with Heinz chili sauce, as I prefer the tomato flavor with meatloaf. They reheat perfectly, making a satisfying lunch the next day.

Turkey Mini Meatloaves
From EatingWell’s Healthy in a Hurry Cookbook
View the recipe and nutritional information on EatingWell.com.

1 pound 93%-lean ground turkey
1 medium zucchini, shredded
1 cup finely chopped onion
1 cup finely chopped red bell pepper
1/3 cup uncooked whole-wheat couscous
1 large egg, lightly beaten
2 tablespoons Worcestershire sauce
1 tablespoon Dijon mustard
1/2 teaspoon freshly ground pepper
1/4 teaspoon salt
1/4 cup barbecue sauce, (optional – I used Heinz chili sauce)

1. Preheat oven to 400°F. Generously spray a nonstick muffin pan with cooking spray.

2. Gently mix turkey, zucchini, onion, bell pepper, couscous, egg, Worcestershire, mustard, pepper and salt in a large bowl, preferably with your hands, without overworking. Equally divide the mixture among the muffin cups. Spread barbecue sauce on top of each loaf, if using.

3. Bake until the meatloaves are cooked through or an instant-read thermometer inserted into the center registers 165 degrees F, about 25 minutes. Let the loaves stand in the pan for 5 minutes before serving.

BBQ Jalapeño Poppers

April 11th, 2010

BBQ Jalapeno Poppers

I have been reading The Pioneer Woman Cooks for quite some time. Written by Ree Drummond, the blog features recipes intertwined with entertaining and soulful stories of life on a working ranch, caring for her kids and husband, holidays with family, and the seemingly endless number of people she knows. But it’s the photos that captivate, making the blog feel like you’re reading a photo-journal created by your best friend.

Published in October of 2009, The Pioneer Woman’s cookbook follows the blog’s visually striking theme. This is the perfect book for someone who may not feel entirely comfortable in the kitchen, with tons of gorgeous instructional photographs and a laid-back, take-it-easy style of cooking. It’s also a great book for people who love meat, meat, cream, butter, and meat, which I do.

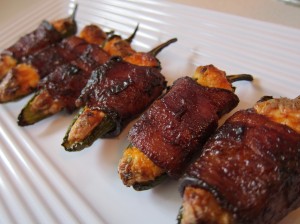
These BBQ Jalapeño Poppers are not only delicious, but they are wickedly fun to make; probably because you know you’re about to serve your guests something irresistible. They’ve got cream cheese, cheddar cheese, bacon, and BBQ sauce. They’re about as evil as a finger food can get.

If you are judicious about removing the peppers’ veins and seeds, you’ll have no spiciness, leaving just the flavor of the jalapeño. Next time, I’d likely leave some of the veins in as I missed the heat. Ree mentions a variation to add pineapple before wrapping the poppers in bacon, which I desperately wanted to try but ran out of time. I’m a little glad about that. Glazing the bacon with BBQ sauce makes these taste like pig candy, so no extra sweetness is needed here. Lastly, do what the recipe says and use a thin cut of bacon (or pound out a thick cut). I used Niman Ranch which is cut thicker than your typical supermarket brand, and I think the bacon could be a little crisper than what I achieved.

These made a great finger-food snack for our Sunday poker game, and fulfilled a promise I made to make a jalapeño-poppers-with-bacon recipe over the weekend for my friend Kip. So, with thanks to Karol who sent me the book for my birthday, these are for you, Kip.

BBQ Jalapeño Poppers
by Ree Drummond
Adapted from The Pioneer Woman Cooks: Recipes from an Accidental Country Girl
©2009 WM Morrow

There are many different versions of these delightful pop-in-your-mouth jalapeños. My sister-in-law Missy makes a more basic version, stuffing jalapeño halves with plain cream cheese, wrapping them with bacon, and baking them slowly for half an hour or so. When she’s feeling particularly mischievous, Missy cooks them on the grill. Either way, they’re a real treat. Here’s my spin on the old classic.

Important: Wear gloves when working with fresh jalapeños or you’ll curse the ground on which I walk because you’ll wake up in the middle of the night with throbbing fingertips. And that’s nothing compared to what happens if you accidentally scratch your eye – or worse, something else.

– 18 fresh jalapeños
– One 8-ounce package cream cheese
– 1/2 cup grated cheddar cheese
– 1 green onion, sliced
– 18 slices thin bacon, cut into halves
– Bottled barbecue sauce
– Toothpicks
– Rubber gloves (or plastic bags) for working with jalapeños

1. Preheat oven to 275°F.

2. Begin by cutting jalapeños in half lengthwise (see warning in headnote). Try to keep the stems intact. They look prettier that way.

3. With a spoon, scrape out the seeds and light-colored membranes. Remember, the heat comes from the seeds and the membranes, so if you can handle the sizzle, leave some of them intact.

4. Now, in a bowl, combine the cream cheese, cheddar cheese, and chopped green onion. Mix the ingredients together gently. And don’t feel you have to use an electric mixer. I do because I’m lazy and don’t like to exert myself, ever. (Too much scrubbing clothes in the washboard, I suppose.)

5. Next, stuff each hollowed jalapeño half with the cheese mixture.

6. Wrap bacon slices around each half, covering as much of the surface as you can. Be careful not to stretch the bacon too tightly around the jalapeño, as the bacon will contract as ti cooks.

7. Brush the surface of the bacon with your favorite barbecue sauce. Chutney or apricot jelly works well, too!

8. Secure the jalapeños with toothpicks and pop them in the oven for 1 hour, or until the bacon is sizzling.

9. Serve hot or at room temperature, and watch them disappear within seconds. I’ve seriously caught guests stuffing these into their purses. Sometimes I have to call law enforcement.

Helpful Hints: Make three times more than you think you’ll need. (You’ll just have to trust me.)

Poppers can be assembled up to a day ahead of time and kept in the fridge before cooking. Or, they can be fully cooked and frozen in plastic bags until you need them. Just thaw and warm up in the oven before serving.

Unless you’re prepared to become instantly addicted, do not place two of these on your hamburger. I mean it. Don’t. There’ll be no turning back after that. (I’m dying to try this. -taetopia)

Variations:

– For a simpler version, omit the cheddar and green onion from the cream cheese.

– Cut sliced peaches or pineapple into small bits and press them into the cream cheese before wrapping the jalapeños in bacon.

– Use pepper jack cheese instead of the cheddar cheese.

Long-Cooked Sugo and Turkey Meatballs with Porcini, Pine Nuts and Raisins

January 24th, 2010
Pasta, Sugo, and Turkey Meatballs

Pasta, Sugo, and Turkey Meatballs

“Oh, Lidia, this is never going to fit!” That’s me, brow furrowed, wooden spoon in hand, peering into my 3 qt. saute pan, talking to Lidia Bastianich as channeled through her book, Lidia’s Family Table. I believe I said that three times over the course of making this recipe. For some reason, it just doesn’t look like you can possibly fit any more ingredients in the pan, but by magic, and by the diligence of a good recipe tester, it all works out.

Chef Bastianich’s cookbook, true to its name, is full of recipes that will feed six or more. There are several recipes, such as this sugo, that describe one base recipe and then several variations or uses for it. For instance, she mentions this sugo is good “as a topping for a big bowl of dressed pasta,” “as a meat course with vegetables,” “in a risotto, using the sauce and broken-up meatballs,” etc. Among the expected recipes for pasta, polenta, and soup, there are some lovely vegetable recipes, such as roasted eggplant and tomato salad, and grilled corn and figs with balsamic reduction, and hearty dishes such as rabbit cacciatore.

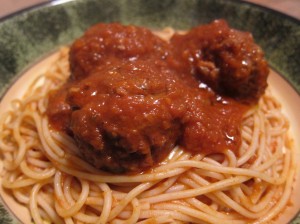
With cinnamon, pine nuts, and raisins, the aroma and flavor of this sugo and meatballs are reminiscent of Middle Eastern cuisine. Although these ingredients typically fall into the sweet spectrum, their sweetness is tempered  by the vegetables of the soffrito and the acid of the tomatoes. I found the flavors of this dish refreshingly unexpected and interesting. The sauce is thick but not cloying, and coats the pasta (should you decide to serve it with pasta) beautifully. But the most incredible thing about this dish is the texture of the meatballs themselves. While sturdy and toothsome on the outside, they are incredibly soft and moist inside. Be forewarned, this is *not* your usual tomato-y sauce with beef or beef/pork/veal meatballs. If you are looking for the typical tomato-sauce and meatballs recipe, this is not it.

This recipe fit the bill as a winter-housewarming recipe (important criteria when it’s less than 40° F. outside), a meal to have together as a family, and the very important opportunity for leftovers. This makes enough for three meals for my family of three. It would have made four, except we ate a half dozen of the meatballs standing over the pot while we were tasting…for research, of course.

The recipe begins by making a soffritto. This is a vegetable base for the sauce, made by finely mincing various vegetables and softening them in the pan, before putting the tomatoes and broth in. Although the recipe says to cook the vegetables approximately four minutes, I cooked them longer. Make sure your vegetables are very soft, or else they will simply be hard pits in your sauce, rather than disintegrating into the tomatoes. In addition, when toasting the tomato paste, make sure it gets nicely browned. The whole concoction of vegetables and tomato paste when mixed together should be slightly darker orange-brown than the color of a basketball.

You’ll want very good ventilation for frying the meatballs, else your house may take on the odor of an Italian street fair for a while. However, Chef Bastianich makes note in her book that the meatballs don’t have to be fried (although I feel you will very definitely miss the texture). If you decide not to fry them, she says to increase the sauce by at least a third (or decrease the meatballs by a third) so that they have plenty of sauce to cook in.

Do not be put-off by the length of this recipe. While there are several steps and many ingredients, the directions are all relatively simple. If you love to cook, you’ll have a lot of fun making this dish. And remember, when you’re looking into the pan feeling certain that another quart of stock or three-dozen meatballs will not ever fit into your 3 qt. pot, believe me, it will.

Note: In the cookbook Lidia’s Family Table, Chef Bastianich includes a variation of this sugo with sausage meatballs. I have omitted directions for that recipe from this text.

Lidia's Family Table

Long-Cooked Sugo and Meatballs
by Lidia Matticchio Bastianich
from Lidia’s Family Table
© Knopf, 2004

About 2 quarts of sugo, to cook and serve with 3 dozen meatballs.

Frying the Soffritto and Starting the Sugo

For the soffritto
– 6 tablespoons extra-virgin olive oil
– 2 medium onions (3/4 pound), minced in a food processor
– 3 or 4 plump shallots, minced in a food processor
– 2 or 3 fat garlic cloves, minced in a food processor
– 1 large carrot, minced in a food processor
– 2 large stalks celery, minced in a food processor
– 5 or 6 fresh bay leaves
– 1/4 cup tomato paste

For the sugo
– One 35-ounce can San Marzano plum tomatoes and juices, passed through a food mill (4 cups)
– 8 to 12 cups or more hot Turkey Broth, Simple Vegetable Broth, or plain hot water (recipes for the broths are in the book, I used my own vegetable stock)
– 1/2 teaspoon salt, plus more if needed
– 1 cinnamon stick

Pour the olive oil into the pan, drop in the onions and shallots, and set over medium-high heat. Stir for a minute or two, until the onions begin to sizzle.

Drop the garlic into a hot spot and spread it out to caramelize for a minute, then stir with the onions. Stir in the carrot and celery, and get them cooking; drop in the bay leaves and cook the soffritto for another 4 minutes until it is starting to dry out. Lower the heat if necessary to prevent burning.

Push the vegetables to the side and drop the tomato paste into a hot spot. Toast it for a minute or more, then blend it into the soffritto. Pour in the milled tomatoes and juices, and stir; slosh the tomato container with a cup of hot broth or water and stir that in too. Bring the sauce to a boil quickly, and cook over medium-high heat for 5 minutes or more, stirring frequently, until it has just begun to thicken.

Pour in 4 cups of the hot broth, stir it in, and note now the level of the liquid in the pan: this is about the level that the sugo should be at the very end of cooking, after the meatballs have been removed. Stir in another quart of the broth, and bring to a lively boil.

Submerge the cinnamon stick in the sauce. Cover the pot and adjust the heat to maintain a steady but gentle bubbling all over the surface of the sugo . Let it cook for at least an hour or longer, checking the pot every 20 minutes or so. It should be redicuing steadily. If it’s barely dropping, or not at all, raise the heat and set the cover ajar ot speed its concentration. If it’s dropping extremely fast, lower the heat to slow the evaporation. Add hot broth or water if needed to keep the sauce at the level you want.

Make the turkey meatballs while the sugo cooks. Once they are finished, complete the recipe as follows:

Have the sugo at a gentle simmer over low heat when the meatballs are fried and ready to go into the saucepan. Have hot broth or water on hand if needed. Drop the meatballs in one at a time; fit as many as you can in the bottom of the pan in one layer, but leave enough space to roll them around. Drop the rest of the meatballs in to make a second layer. Add hot broth or water if necessary so the meatballs are covered with liquid. Stir gently to mix the broth with the sugo – don’t break the meatballs! Cover the pan and raise the heat slightly to bring the sugo back to a simmer. Set the cover ajar and adjust heat to maintain steady simmering (but no threat of burning the meat on the bottom), and cook the meatballs for 35 to 40 minutes.

Turn off the heat and let the meatballs cool in the sugo and absorb more of its flavor (unless you need them right away). When cool, remove them to a big bowl. If the sauce is thin (probably well above the 2-quart mark), return it to a boil gradually and cook it uncovered to thicken. Stir frequently as it thickens; reduce it to the 2-quart level, or to whatever consistency you like – that’s the most important guideline. Taste the sauce during this final cooking, and add salt, if needed, or adjust the other seasonings.

Serve sauce and meatballs right away if you want. Otherwise, pack the meatballs in containers with enough sugo to cover and the rest of the sauce in separate containers. Portion them, for convenience, in the amounts you’ll use in different dishes. Store in the refrigerator for 4 days, or for several months in the freezer.

Making Turkey Meatballs with Pine Nuts and Golden Raisins

– 1 1/2 tablespoons extra-virgin olive oil
– 1 medium onion, finely chopped (about 3/4 cup)
– 1/2 teaspoon salt, plus more as needed
– 4 slices dried white bread from a sandwich or big Italian loaf
– 1 to 2 cups milk
– 3 pounds ground turkey meat
– 3 large eggs, well beaten with a pinch of salt
– 2 tablespoons chopped fresh Italian parsley
– 1 1/2 tablespoons porcini powder (to make porcini powder, place dried porcini in a spice or coffee grinder, and pulverize them as fine as possible – for more notes on porcini, see Lidia’s Family Table)
– 1/2 teaspoon freshly ground black pepper, or to taste
– 3/4 cup golden raisins, plumped in warm water and drained
– 3/4 cup pine nuts, toasted in a dry skillet

Pour the olive oil into a medium skillet, drop in the minced onions, sprinkle with a pinch of salt, and set over medium-high heat, stirring until they begin to sizzle. Lower the heat and cook for 4 to 5 minutes, stirring occasionally, until the onion is wilted and slightly dry (but not colored). Scrape out of the pan and let cool.

Break up the dry bread slices into pieces roughly an inch or two across – you should have almost 4 cups – and put them in a shallow bowl or baking dish. Pour enough milk over to cover them, and soak for 4 to 5 minutes. When the pieces are completely soft, gather them in your hands and firmly squeeze out all the milk; you should have almost 1 cup of densely packed moist bread.

Loosen  up the turkey meat if it’s been compressed in packaging; spread it out in a large mixing bowl. Pour the beaten eggs on top, sprinkle on the parsley, porcini powder, salt, and freshly ground pepper. Scatter the drained raisins and pine nuts on the meat, then spread the cooled wilted onions on top. Break up the clump of wet bread, spreading little bits over the meat. Now fold, toss, and squeeze the meat and seasonings together with your hands and fingers to distribute all the ingredients evenly.

Spread the flour about 1/4 inch deep in the center of a baking sheet.

Pour vegetable oil into a large, heavy skillet or saute pan – 12 inches in diameter if possible – to a depth of at least 1/3 inch.

Scoop up a portion of meat with a small ice-cream scoop, a large spoon, or your fingers. Lightly shape the meat between your palms into 2-inch balls, a bit larger than golf balls (or whatever size you like). Drop each ball onto the floured sheet, roll it around until coated, then place it on another baking sheet. Form and flour all the meat balls in this manner.

Set the skillet over heigh heat until the oil is very hot. With tongs or a spatula, carefully transfer meatballs to the pan, as many as you can, leaving at least an inch or so between them. Cook for a minute or two, until they’ve starged to brown on the bottom, then turn them continuously – watch out for oil spatters – until golden-crusted on all sides, about 6 minutes. As they are done, transfer the fried meatballs to a baking sheet (I set them on a cooking rack atop a baking sheet to keep them dry – T). When all the meatballs are on the tray, sprinkle salt lightly over them (just a couple of pinches in all).

Note: The meatballs will finish cooking in the sauce; they are fried just until a golden crust forms. So, if you intend to eat them as is instead, be sure to fry them longer, until they are cooked through.

Before frying the next batch, turn off the heat and, with a fine-meshed skimmer or strainder, remove any browned bits from the oil. Add oil if needed to restore the 1/3 inch depth and heat it up again. (I must admit, I completely skipped this step. I found there was plenty of oil to fry 3 dozen meatballs in about four or five batches)

When all the meatballs are fried, cook them with the sugo following the instructions above.

Sugo and Turkey Meatballs with Pine Nuts and Raisins

Winter Squash and Leek Pie

December 18th, 2009

squash_tartOver the years I have surrounded myself with wonderful cookbooks. Cookbooks that for some reason I never cook from. I love to own them and read them, but I never seem to get around to actually using them as often as I should. I usually get an idea in my head, assemble the ingredients at the market, and throw it all together at home with, I am happy to say, better-than-passable results. I think it has something to do with my natural desire for immediate gratification, combined with my irrational fear of recipes that begin with the words “Day One.”

I now have it in my head that a great project would be to make a few recipes from the books I own each week. I’ll finally get some mileage out of my purchases, and see which books stand up to the test. Not sure how this will turn out or how long I can keep up with it, but we’ll give it the good old college try.

This week’s recipe comes from Martha Rose Shulman’s “Mediterranean Harvest: Vegetarian Recipes from the World’s Healthiest Cuisine.” Never was there a sorrier title for a book filled with truly luscious recipes. But trust me, you couldn’t get farther away from “100 Recipes for Steamed Broccoli with Garlic” for healthy recipes than this book. Its recipes include “Baked Semolina Gnocchi with Butter and Parmesan,” “Honey-Orange Biscotti,” and “Zucchini, Potato, and Artichoke Moussaka.” It is one one of the cookbooks I took the pleasure to read straight through, like a novel, as the recipes were so enticing.

This filling of this squash and leek pie has a very creamy texture, which contrasted quite nicely with the crispness of the phyllo. Although it is savory, a definite sweetness comes through from the squash and mint.

squash_tart_wholeA note on the recipe: The author doesn’t say exactly how you’re supposed to get the crackly phyllo dough into the edges of the tart pan. Just squish ’em in. It’ll work out just fine. Also, a spray bottle of olive oil works wonders in place of a brush. There’s much less of a chance you’ll break your dough.

While this tart makes for a great vegetarian entree, my husband mentioned to me that it might be good for breakfast. I had the leftovers for breakfast two days in a row. My husband is a very smart man.

med_harvestWinter Squash and Leek Pie
by Martha Rose Shulman
from Mediterranean Harvest: Vegetarian Recipes from the World’s Healthiest Cuisine
© Rodale, 2007

– 2 1/2 pounds winter squash (1 large or 2 smaller butternut squash), seeds and membranes scraped away, cut into large pieces (see Note)
– 1/2 cup chopped fresh parsley
– 1/4 cup chopped fresh mint
– 1/4 teaspoon freshly grated nutmeg
– 4 ounces feta, crumbled (about 1 cup)
– 1/2 cup freshly grated Parmesan
– 2 tablespoons extra virgin olive oil, plus additional for brushing
– 3 large leeks (about 1 1/2 pounds), white and light green parts only, washed well and chopped
– 2 large garlic cloves, minced or put through a press
– 3 large eggs, beaten
– Salt and freshly ground pepper
– 12 sheets phyllo dough

Note: If using butternut, cut in half crosswise, just above the bulbous bottom part, then cut these halves into lengthwise quarters and scrape away the seeds and membranes.

1. Steam the squash over boiling water for 15 to 20 minutes, until tender. Drain and cool in a colander for another 15 minutes (butternut squash will not be watery). Peel and place in a bowl. Mash with a fork, large wooden spoon, potato masher, or pestle. Stir in the herbs, nutmeg, and cheeses.

2. Heat the olive oil in a large, heavy nonstick frying pan over medium heat and add the leeks. Cook, stirring, until tender and just beginning to color, 5 to 10 minutes. Add the garlic and continue to cook for another minute, until fragrant. Add the leek mixture to the squash. Reserve 2 tablespoons of the beaten eggs for brushing the tart. Mix the remaining eggs into the squash. Season to taste with salt and pepper.

3. Heat the oven to 375 F. Brush a 10- or 12-inch tart pan with olive oil and layer in 7 sheets of phyllo dough, placing them not quite evenly on top of each other so that the edges overlap the sides of the pan all the way around and brushing each sheet with olive oil before adding the next. Scrape in the filling, fold the dough edges in, and brush with olive oil. Layer 5 more sheets of dough over the top, brushing each sheet with olive oil. Stuff the edges into the side of the pan. Brush the top with reserved egg. Pierce the top of the pie in several places with a sharp knife. Bake for 40 to 50 minutes, until the top is golden brown. Serve warm or at room temperature.

Advance Preparation: The squash can be cooked and mashed 3 or 4 days ahead and kept in the refrigerator in a covered bowl. The filling will keep for 2 or 3 days in the refrigerator.

Leftovers: The tart keeps for a few days, but you must keep recrisping the phyllo. This is easily done, either in a low oven (250F to 300F) for 10 to 20 minutes, or in a hot oven that has just been turned off for 5 or 10 minutes. (I used a microwave for reheating. Was it crispy? No. But it still tasted wonderful. -Taetopia)

Portuguese Orange-Olive Oil Cake

November 10th, 2009

Orange-Olive Oil CakeA couple of weeks ago I began hearing whispers about a certain cake that was so very moist and flavorful, and once you’ve heard from more than three people on three completely separate occasions that there is something you MUST try, well then, you must try it.

David Leite
is one of my favorite essayists on food. He has a new book out, “The New Portuguese Table: Exciting Flavors from Europe’s Western Coast,” which is receiving a lot of very good press. I also think he’s a natural on TV. I am not as familiar with his recipes, nor am I with Portuguese cuisine, but after trying this cake, I’m sold on both and am looking forward to trying more.

This is the perfect tea cake. Or dinner cake. Or breakfast cake. Or alone-in-the-closet-with-a-fork-cake. It is wonderfully moist, sweet but not too sweet, with a mouth-watering aroma of orange from both the juice and zest. David says on his site that it took 13 variations to get it right. Oh, did he get it right!

Pay attention to a few important notes: The first is to use a light-colored bundt pan. Mine is not exactly dark, but not light colored, and the outside of the cake was definitely a darker brown than I would have liked if I were to present it whole. This did not ruin the flavor, and could have been masked by a dusting of confectioner’s sugar, but just a word of caution. Second, the batter will have a much MUCH thinner consistency than one is used to for cake. Third, David says to let the cake rest a day or two. We had some the day after it was made, and then the day after that. I can report that the cake on day 2 was even more delicious than day 1. I urge you to visit David’s website to watch a video of how it is made (you can get a sense how thin the consistency of the batter is), and get the recipe from the source.

Portuguese Orange-Olive Oil Cake
by David Leite
from The New Portuguese Table: Exciting Flavors from Europe’s Western Coast

Make sure to use a light-colored Bundt pan. A dark one will turn out a cake that sticks and is unpleasantly brown. Since this cake only gets better with age, don’t even think about taking a bite until the day after you make it, or even the day after that.

– Nonstick baking spray with flour
– 4 to 5 large naval oranges
– 3 1/2 cups all-purpose flour
– 1 1/2 teaspoons baking powder
– 1 3/4 teaspoons kosher salt
– 5 large eggs
– 3 cups granulated sugar
– 1 1/2 cups mild extra-virgin olive oil
– Confectioners’ sugar, for sprinkling

Method

1. Position a rack in the middle of the oven, remove any racks above, and crank up the heat to 350°F (175°C). Coat a 12-cup Bundt or tube pan with baking spray and set aside.

2. Finely grate the zest of 3 of the oranges, then squeeze 4 of them. You should have 1 1/2 cups of juice; if not, squeeze the 5th orange. Set aside.

3. Whisk together the flour, baking powder, and salt in a large bowl and set aside.

4. In the bowl of a stand mixer fitted with a paddle attachment, or with a handheld mixer in a large bowl, beat the eggs on medium-high speed until well-combined, about 1 minute. Slowly pour in the granulated sugar and continue beating until thick and pale yellow, about 3 minutes. On low speed, alternate adding the flour mixture and oil, starting and ending with the flour, and beat until just a few wisps of flour remain. Pour in the orange juice and zest and whirl for a few seconds to bring the batter together.

5. Pour the batter into the prepared pan and bake until a cake tester comes out with a few moist crumbs clinging to it, about 1 1/4 hours. If the top is browning too much as the cake bakes, cover lightly with foil. Transfer to a wire rack and cool for 15 minutes.

6. Turn the cake out onto the rack and cool completely, then place it in a covered cake stand and let it sit overnight. Just before serving, dust with powdered sugar.